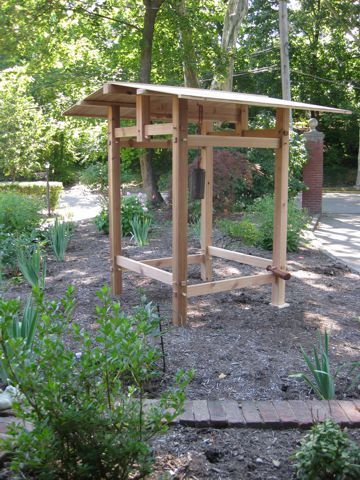
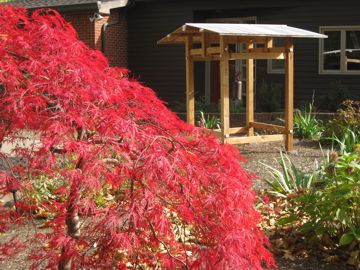
I’m a bit late talking about the projects last year. About 10 years ago, I bought a bell at Pennsic. The idea was that it would go in a little shelter in my backyard. Well, that was the previous house with the previous back yard. However, my hubby honey bunny didn’t stop thinking about it or planning it. This past summer, this came to the top of his project list. He made a lumber run that took most of a day. Then after 6 days of work, I had a belfry. In Japanese it would be called a shoro.
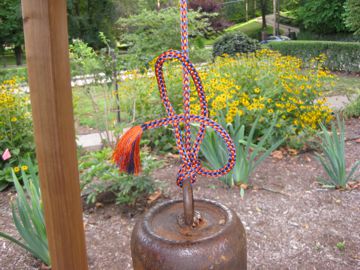
Now that looks great, but the bell needs a better cord. OK. I made a cord. I used imposter silk because it would be outside.
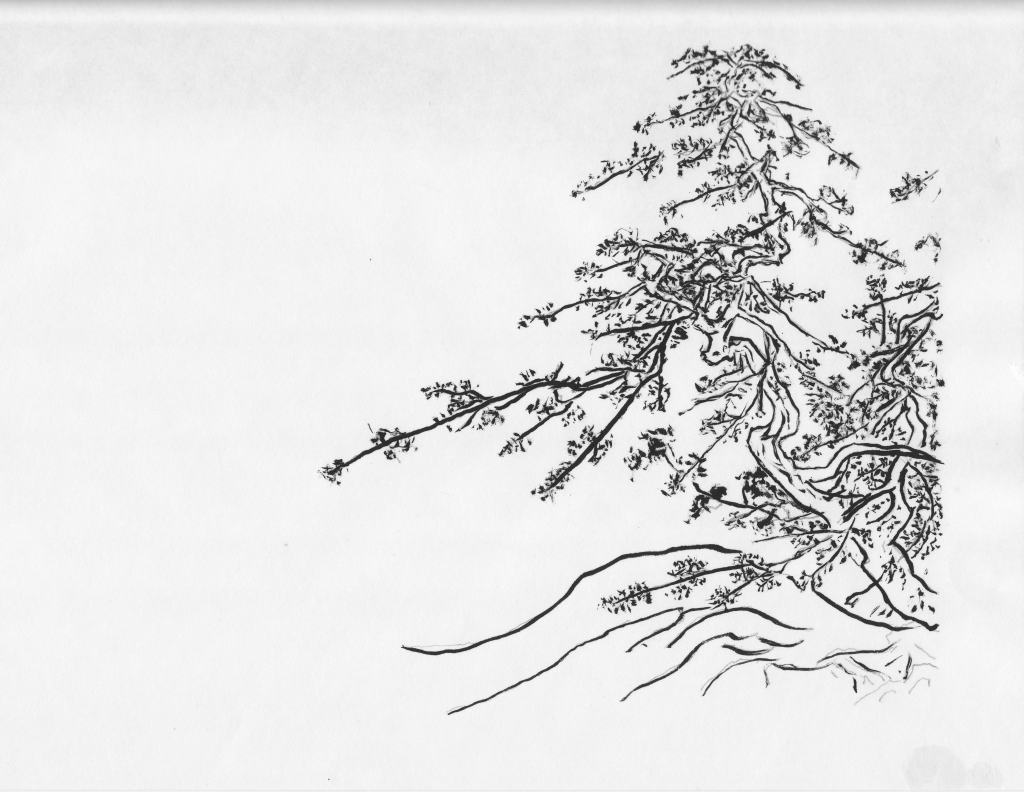
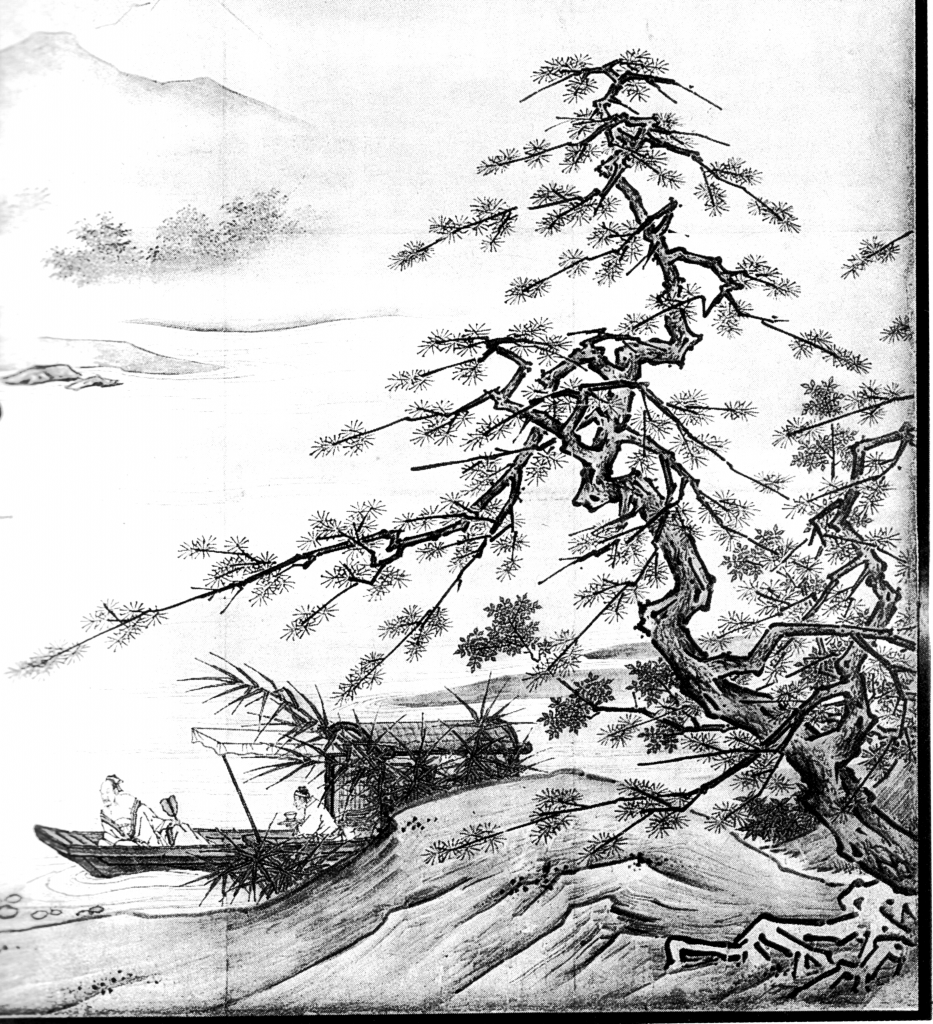
My husband has done lots of ink drawings and ink drawings with color highlights for scroll blanks. There has been talk online from people trying it out as a new artistic endeavor. I know of many painted Japanese screens that I think are lovely. Copying even a small part of the finished piece could make for a nice illustration for a scroll. Here is my first effort.
This was done with a brush and pre-mixed black ink on hosho sketch paper. I had the adjusted scan of the original on a lightpad, so I could trace the image. I had done some pencil drawing on the trunk and branches to define them first. It was very difficult getting fine lines especially for the pine needles.
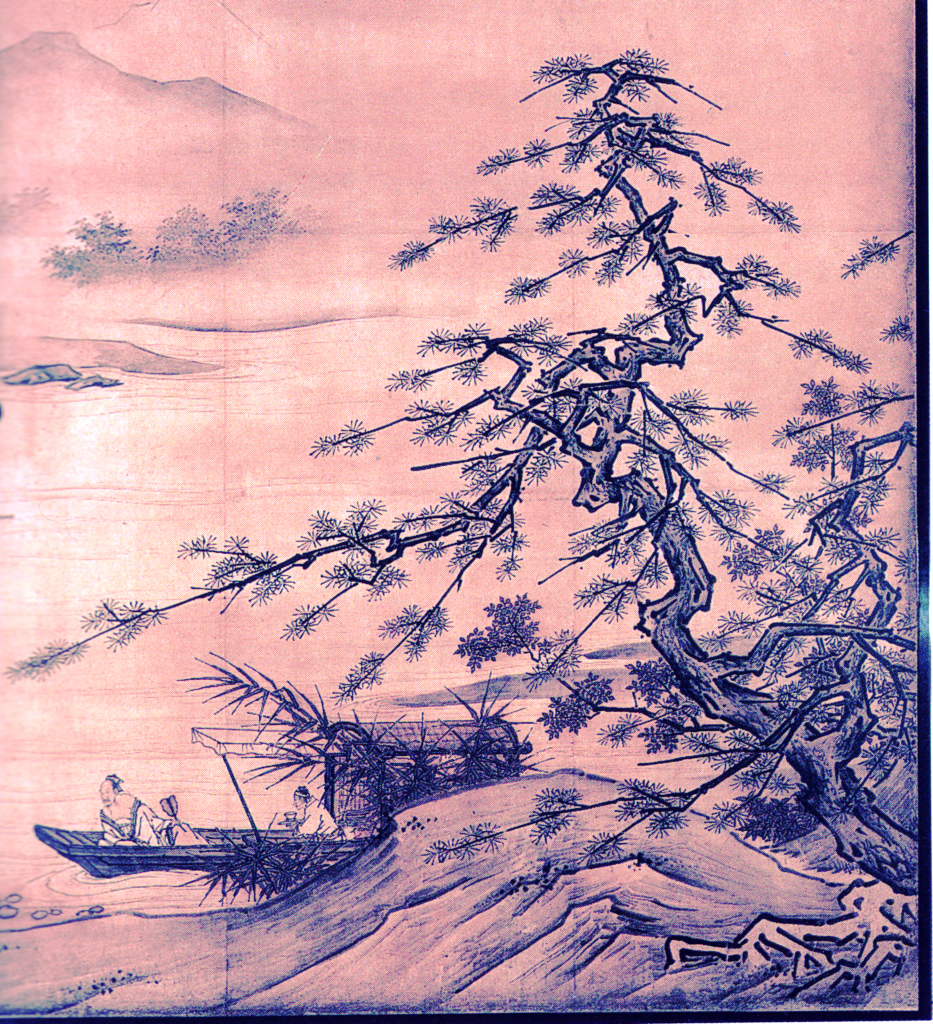
Here is the image that I was copying from on the lightpad. As you can see I don’t even attempt to draw most of the image.
And here is what that portion of original looks like. This is from a set of 8 scrolls, but only 4 are pictured in the book.
Source: Hickman, Money L., Coats, Bruce A., Guth, Christine, Pekarik, Andrew J., Rosenfield, John M., Rousmaniere, Nicole C. Japan’s Golden Age Momoyama. New Haven: Yale University Press, 1996.
Due to ongoing COVID-19 restrictions on large gatherings and travel, the SCA Kingdom of Aethelmearc decided to have spring academy online. Now comes the question of what I should teach. Fortunately, one of the regular attendees of online sewing asked for instructions to make a simple Japanese skirt.
Why a skirt? Well, for a woman, hakama pants are pretty challenging to manage when using the toilet. In a port-a-john that may have muddy/wet floors, it’s worse. Now what about a simple kosode? Well the concern is freedom of movement especially if you are cooking, or carrying things around. So an ankle-length skirt over a loose-fitting top would be better.
I have two Japanese skirts that I make and wear. The first is a hakama, but sewn as a skirt by sewing the front left and right from waist to hem. Same for the back left and right. Do this instead of creating split leg hakama with a gusset or a long inseam panel. I have seen one or two examples of hakama skirts in books and display, but they were from the Heian period, were red, and the skirt length was longer than floor length. Mine are ankle length and not red, and they are good working clothes.
See it looks just like a hakama
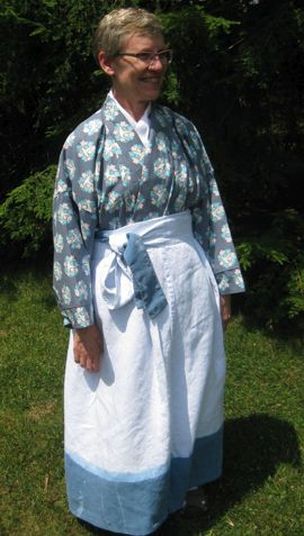
The second skirt is a wrap-around skirt called a mobakama. It is shown in the costume museum website and book and in another book. It is from the Kamakura period, and was a maid’s garment. The skirt length was just above the ankle. That sounds like the perfect working garment. Better still, there are examples of this garment in historical costume books. This is the garment that I researched, made, and taught.
The pictures all show a wraparound skirt with the tie, or himo, worn slightly above the natural waistline. The garment hem is just above or at the top of the ankle. One example is clearly a silk jacquard weave, but the others may have been silk, raime or hemp. All are shown with simply dye patterns, although the plaid skirt was probably woven.
How many pleats, how deep, where they were positioned and whether they were box pleats or knife pleats seems to have varied in the garments that I saw pictured. My recommendation is that the finished skirt wrap at least 1 1/2 times around your waist and that the starting panel should be at least 3 times your waist before pleating.
I made a sample garment, to make sure I had reasonable instructions for assembly. I assumed modern fabric width and that you were using a sewing machine. I also did a simple dye pattern on the fabric. Both the construction, and the dyeing efforts were instructional for me and I made sure to include lessons learned in the class.
The waistband isn’t centered at the top of the skirt. The bow is tied at outer edge of the wrapping, so you need to figure out how to attach it so that you have two equal lengths when tieing the bow. It took me a while to realize that the waist tie wraps twice around the waist and ends at the bow, so that the midpoint of the waistband should sit right under the bow. Then I take the pleated skirt without the waistband attached and wrap it so that the outer edge is where I want it. Then attach the midpoint of the himo at a point just below that outer edge.
Regarding the dyeing lessons. I had a few. 1. Thiox can go bad with age. It is used as a reducing agent with pre-reduced indigo crystals. There are alternative reducing agents that don’t expire as quickly, so I should pick one of them next time. 2. If you want to do a fading dip dye pattern, indigo isn’t the best choice for a dye. You want to reduce the amount of oxygen that you introduce to the dye vat. You also need to keep the fabric free-moving in the dye so the dye is even but that is difficult when you are dip-dyeing. 3. I had a medium weight hemp, so it won’t bleed as much as say a silk especially a lightweight silk.